Templates are some of the most useful lead magnets you can create. If you’re in the content creation business then stay tuned because I'll show you how to make your own in this video
In this video I show you how to make your own.
Video Transcript
Templates are some of the most useful lead magnets. If you're in the content creation business, then stay tuned because this one's for you.
It sounds pretty obvious, but templates are really just content that a reader can take, customize, and use for themselves. It's the ultimate shortcut, helping people to make a lot of progress with minimum effort. This template pack includes three sample emails that people can use to promote a Black Friday sale for their e-commerce store.
A freelance copywriter could offer these templates to e-commerce businesses so they can use them in their own promotional email marketing campaigns. It's a really straightforward format consisting of just a Cover page, a short introduction, and then three templates, each of which are just different emails. And, finally, there's a Call to Action page at the end. You can find the link to this template pack in the Description below the video.
Now we know what a template pack is. Let's go ahead and make one in Beacon.
Creating An Email Template Lead Magnet In Beacon
It's really easy within Beacon to create your own set of email templates. So, I'm going to show you how to do it right now.
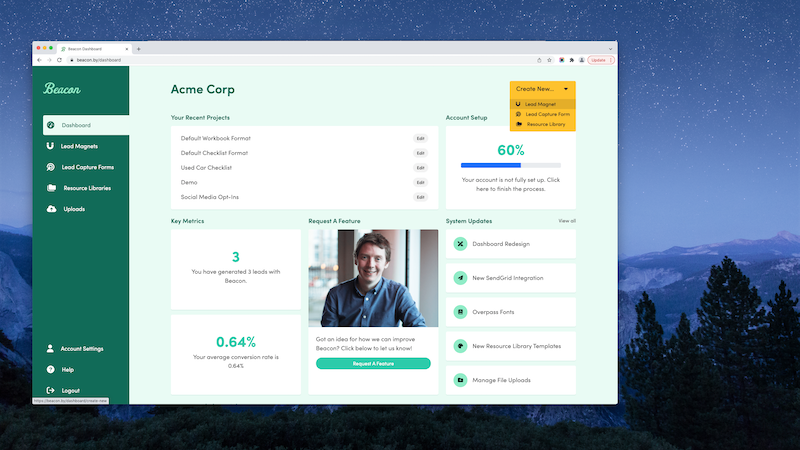
First of all, I'm going to go to the Beacon dashboard. Click the Create New button and select Lead Magnet.
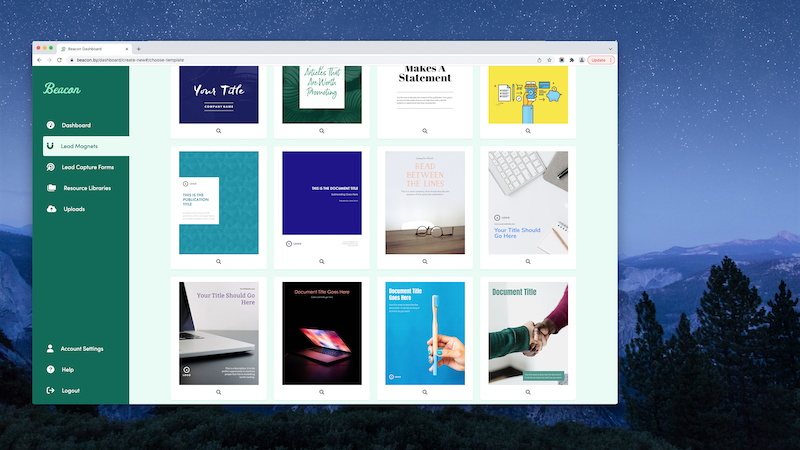
Next, I'm going to scroll down and choose the Email Templates format. We're not going to import any blog content. And then we have to choose our template. The lead magnet that I have in mind - basically imagine that I run a copywriting business, I provide copywriting services to e-commerce clients. And, so, if you've got an e-commerce store, I want to write copy for you. The lead magnet in particular that I'm going to make is some email templates that e-commerce stores can use during a Black Friday sale. That's just to give you a bit of context. So, now let's look for a template that suits that scenario.
This template might work. We've got a cover image of somebody writing content. I'm a copywriter in this scenario, so that one might work. Same goes for this one, as well. That might work. This one's pretty nice. I love those flatlay images, especially when there's… A flatlay image is basically when you're taking a photo of a desk from above of the keyboard and notepad and stuff. That looks pretty good. With this one, there's a lot of white space to sort of put in our content. We can add our logo there. We can add a nice big title there. So, I think I'm going to choose this template for our lead magnet. Let's just click on that.
We'll give it the title of, Black Friday Templates. That's for our purposes so we an refer back to it later. And we'll create the lead magnet.
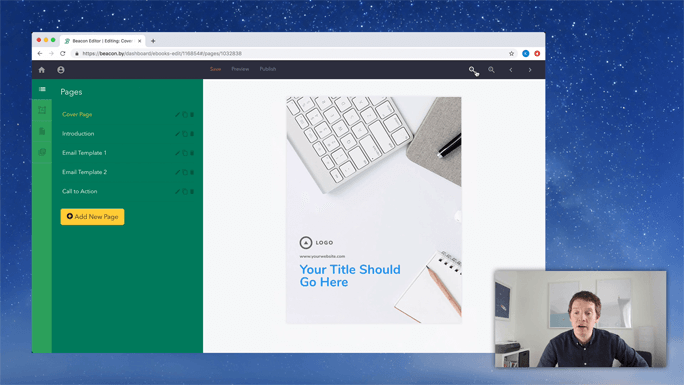
So, let me just zoom out. Now, we're in the main Beacon editor. We can see what the Cover page looks like here on the right-hand side. And on the left-hand side, we can see all the different pages within this document.
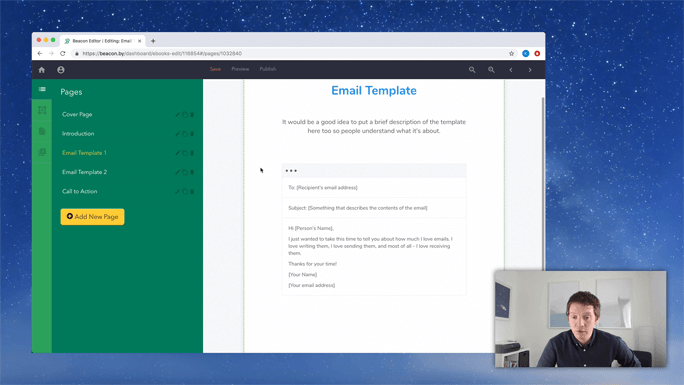
So, we've got the Cover page, we've got an Introduction, we have an email template. Let me just zoom in so you can see that. This page consists of the template title, a short summary like a description of what the template is all about, and then we've got these three boxes here which essentially make up the email format. So, we have the To field, the Subject field, and then the Body field. Like, if you've ever sent an email, you know what this is. You don't need me to explain it to you.
Customizing Your Email Template Lead Magnet
So, what we're going to do is, we're going to swap out all this dummy content with our own content that our readers can take and reuse for their own purposes. So, that's the email template page. As you can see within this document, there's another template which is exactly the same. If you wanted to include two templates, you would customize both of these. If you just wanted to include one template, then you would delete the second one if you don't need it. I think in this scenario, we're going to create maybe three or four email templates. So, I'll end up just like duplicating the email templates so there's three of them. And, finally, there's a Call to Action page that allows potential customers to book a consultation with me. So, the idea is that they'll like the templates that I've provided to them for free, and then they might want to follow up and hire me to do some paid work for them. So, that's the idea of a Call to Action.
I should also say that a Call to Action should pretty much always be at the end of your lead magnet. So, I'm just going to drag and drop that to the end of the list, so it appears as the last page in the document. Anyway, enough chat from me. Let's go back to the Cover page, and we're going to start editing this document, customizing it to make it our own.
I'm going to zoom out so you can see. The first, most obvious, thing to do is just to customize the title. So, I'm going to click the title, going to highlight the text, and I'm going to call this, Three Black Friday Email Templates. So, it fits in nicely there. In fact, you could probably make this text a bit bigger, like we've got a lot of space underneath. So, let's just go over to the blue menu and bump that text size up a little bit more. So, that's looking good. You'll notice that the lines look a little bit squashed there, so I'm just going to increase the line height a little bit. That's looking good.
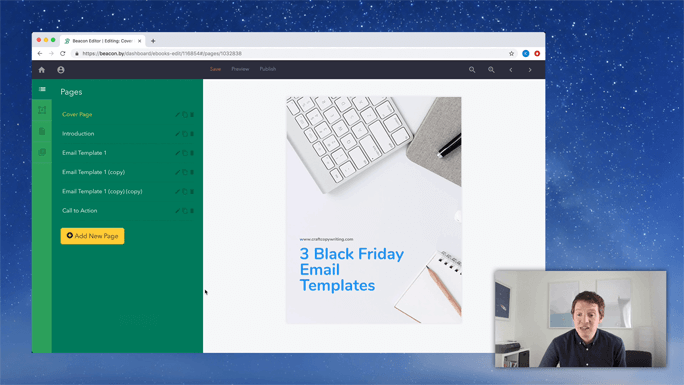
As I said, we're running a copywriting business. So, we should make sure that our website address is in the front of the cover of the lead magnet. So, I'll call it craftycopywriting.com. I haven't got a logo for this fake business, so let's just delete this image here. I'm going to click on it and go over to the blue menu, and then that will delete this image. So, that's our Cover page. It's looking good. You don't have to be overly fancy here. It's got a nice, striking image. The title of the lead magnet sort of describes exactly what is included in this document. So, there's no need to go overboard with it. I'm happy with that. Let's move onto the next page.
This is the Introduction page, and as always, an Introduction page is a great opportunity for you to add some context to the email templates that you're providing. Like, if you just give people these random email templates to download, they probably wouldn't know how to use them or when to use them. So, it's up to us to add a little bit of context to help guide them into the best ways to use these templates. And, also, it gives us a chance to really show off our experience and our expertise, so the reader begins to trust us. And, also, it helps us to give a little bit of a personality to the document because, at the end of the day, there's a person that has written these email templates and that's me. So, I want people to know that I wrote them, that I'm good at what I do, and I just want to get my personal brand across so that other people can make the most of these templates. So, I'm just going to edit this text on the Introduction page now.
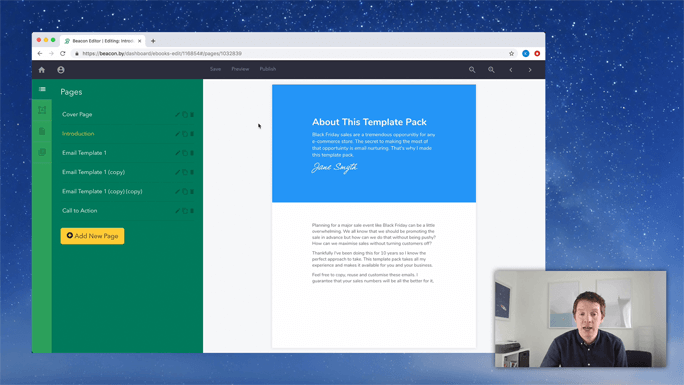
So, that is the Introduction page done. You can see this finished version of this lead magnet here, so you can read over the actual text in this Introduction. But, basically, it's just me setting the scene. It's me saying that Black Friday sales are a big opportunity for your e-commerce store. So, that's helping me to get across to the customer that I understand that this is a big opportunity for them, it's important that they get it right. So, empathizing with them and their situation so they're trusting me a little bit more. And, then, I'm saying that I've been doing this for 10 years. So, again, a little bit more trust, so they're more likely to take the templates that I've created for them and actually use them, because that's the goal at the end of the day. Like, we don't want people to just download the lead magnet. We want them to get actual value from it. So, that's the Introduction page.
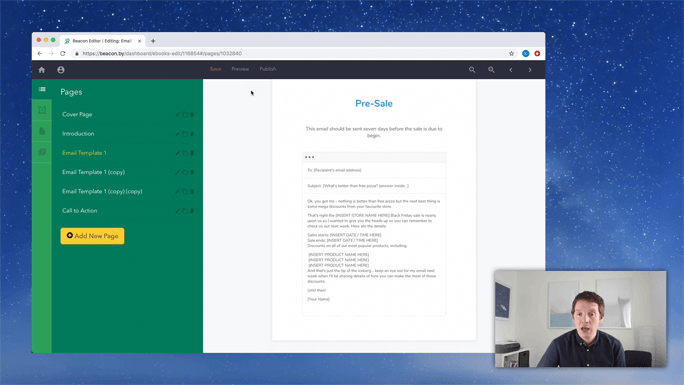
Next, let's move on to the first of our email templates. The email template format, it's very basic. We're going to add the headline for the email template. And this headline is going to be, Pre-Sale. So, essentially, this is an email that people should put out before the sale starts. I'm going to make sure that text is in bold. I'm going to use the Formatting menu to center align it. And, then, I'm going to edit this Description text which comes below the headline, just to tell people how it should be used. In this case, it says, "This email should be sent seven days before the sale is due to begin." So, we're just giving people a helping hand to let them know when to use this email template. We're taking the thinking out of it. We want people to just basically take these templates, copy and paste them, and get on with their day. We're trying to make this as easy as possible for them.
Now if I zoom in to the actual email part, we can see that the To field should be the recipient's email address. That's not going to change. So, let's leave that. And Subject for this email is going to be something like, "What's better than free pizza? Answer inside." So, a subject line for any email should always sort of grab people's attention, have a little bit of intrigue to make people actually click into the email. So, this subject line is probably a bit silly, "What's better than free pizza? Answer inside." It's a bit of fun. So, that's the Subject line. Now, we need to add in the text for the body of the email. I have this saved in another plain text document. I'm just going to take that, like I took this out earlier, so you don't have to watch me typing. I'm just going to copy that from the plain text document and add it in place of this dummy content. So, I've pasted it in. And you can see, if I zoom in a little bit there, you can read it.
After the Subject line, "What's better than free pizza?" the email starts with, "Okay, you got me. Nothing's better than free pizza. But the next best thing is some mega-discounts from your favorite store." I'm not a copywriter. It's just for example purposes for this video, so please don't judge me on the copy. But you get the idea. The Subject line should grab people's attention, and in the actual email, that's the real content that you want people to copy and paste if you're creating your own email templates.
Another little tip for you is that, you'll notice I have lots of content in capitals and in these square brackets. Basically, that's because I want to make it very obvious that some of this content has to be customized, like the name of the e-commerce store, the date that the sale starts, the date that the sale ends. This is all specific to the individual person who will be using this template. So, by using all caps and square brackets, I'm trying to hopefully make it clear that people should swap this content out with their own. And, if people are just copying and pasting blindly from your templates, they might miss some opportunities for customization. So, make it very obvious where they should customize. It sort of helps reduce the chances that they're going to do that.
I'm going to close this blue menu, zoom out a little bit so you can see the full page, and then I'm going to Save. You can see now, that's one email template done. That's one piece of content that the reader can download the lead magnet, copy the template content, and use it in their own situation. That's why it's a really valuable lead magnet. We're really helping people to achieve something. Like, in this case, we're helping e-commerce owners to increase sales on a busy day of the year. They're going to thank you for that. This is good content. It's valuable to your potential customers. So, that's one template done. Let's do the next one.
Again, we're going to customize the actual headline of this email page. This one is going to be something like "Sale Opens." This is the email that people should use whenever the sale actually opens, and we should just write that in the Description here. So, again, we're just giving people a helping hand and sort of describing when this template should be used. You don't want someone downloading this lead magnet and using all the templates at once. They're supposed to be scattered out and spread out over the course of a few days. We're just making it obvious for them.
And, again, we're going to edit the body of the email. I have this email, pre-typed out in a plain text document. I'm just going to open this up, going to grab my sample content, copy it, go back into Beacon, and replace this dummy content with our own. So, there you go. Again, you'll notice that we've got these pieces of content in all caps and square brackets to help people make sure they don't miss some customizations that need to be done. So, let's zoom out. Our second template is done. Most of the work in this format is actually writing the email templates. I can't really help you with that too much, but with the design and the layout, that's all taken care of. So, you should just be able to copy and paste your content directly into our templates.
Let's go to the Pages tab, and we've got one more email template to do. I think the title for this one is "Last Chance." I'm going to highlight that. Make sure it's bolded and centrally aligned, and the Description for this email so people are under no illusions of when they should actually be using this email. I'm going to zoom in. The Subject line for this one… Let me go into the text document. I have it there. So, for email three, the Subject line is "Last Chance for X% off." I'm going to copy the Subject line, go back into Beacon and replace the dummy Subject line with my own. And, then, I'm going to go back into my text document, grab the body of the email, copy it, go back into Beacon, and replace the actual body of the email with my own content. I'm just going to clean up, there's a few extra spaces that have been added here. So, I'm going to get rid of them. And then you zoom out. That's looking good. It's another email template done. So, in just a few minutes, we've been able to create a pretty valuable lead magnet with three unique email templates. I didn't write the email content in those few minutes, but the lead magnet is made because we already had that content in hand.
Adding A Call To Action Page To The Lead Magnet
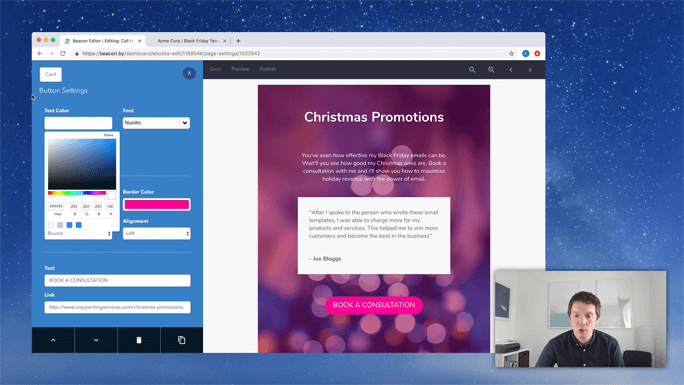
And our last page is the Call to Action. Again, every lead magnet that you create should end with a Call to Action. It's your chance to promote your premium products and services. So, in this particular example, the Call to Action is… So, if I have a copywriting business and I'm giving you free content to use in your Black Friday sale, you're not going hire me for your Black Friday promotions because I've just given you that content for free. But you might hire me for the Christmas promotions which are right around the corner. So, let's use this Call to Action as an opportunity to promote my Christmas copywriting services.
So, let's edit this headline. I'm just going to make it very obvious, "Christmas Promotions." And then I'm going to add in a bit of a description about what services I can offer for these Christmas promotions. That is a very generic statement to try and promote these Christmas promotions. You could also include like a testimonial from a happy customer here. Again, just to add a little bit of social proof to prove that you're good at what you do. Like, "I'm so good, other people have already paid me to do this." That's what the testimonial is for.
At the end of this Call to Action page, we always have this Call to Action button, which in this case, is to book a consultation. So, we're going to click on the button and use the blue menu to customize the URL on the left. It's going to be… Can't even remember the fake company we created, so it's like craftycopywritingservices.com/Christmas promotions. Something like that. So, that's a lead magnet, more or less, done. I'm just going to preview that just to get a sense of what it looks like.
It's got the Cover page looking good. Oh, craftcopywriting. I forgot it. So, since the Cover page is looking good, the Introduction sort of helps to sort of establish my credentials, my credibility. I empathize with the readers so that they know I have experience in that industry. And, then, we have the templates. So, the first one is a pre-sale template. I know that because we've got a good headline. This email should be sent seven days before the sale is due to begin. That's a perfect preamble into this template. It leaves no doubt. And the reader can just copy and paste this content and send it out seven days before the sale is due to begin. That's useful content.
The next template is when the sale is open. They'll do the exact same thing, but this time it will be on the morning of the sale.
And, then, finally, we've got a Last Chance email that goes out three hours before the sale is due to end. Now, if you put yourself in the position of like an e-commerce store owner who's under a lot of pressure during busy holiday periods, you don't have time to think about emails and sending out these types of things. But if you came across a lead magnet with content that's this valuable that you can just take and put out as your own content, you're going to be so appreciative of that. And if you get good results, you're going to really respect the person who made the lead magnet. So, then, ideally, you're going to end up wanting to hire them for your Christmas promotions.
Just looking at this page, it's a little bit blank. It's not really doing much to grab the reader's attention. So, let me go back into Beacon and see if we can just make that a little more interesting. A good way of making Call to Action pages stand out a little bit more so that people don't ignore them is just to add like a background image. Let's do that by the Page Settings. I'm going to click Background Image. I'm going to upload an image. And this image is of a Christmas tree, so it fits perfectly with our Christmas promotions theme. You'll notice that now we can't really read this text. It's not so clear. So, one trick for making text… Often, you're going to have text on top of a background image. That's just the way it goes. So, to make that text a little bit more readable, what I like to do is add like a color tint. And you can do that through the Page settings on the left-hand side. Once you have a background image uploaded, you'll see this Image Tint option. I'm going to set that color. And image tint is white. So, I'm going to just move that along and make it nice and sort of a purply pink color, like it sort of blends with the background already.
You can see already that our text is starting to stand out a little bit more. So, even if I change the color of this text now, it's going to really stand out. I want to click on the text and change this color to white. It's very legible now, very readable. I'll do the same for the headline. And let's make that bigger. Let's move that up to like 48 so it's nice and big. This should really stop people in their tracks.
And, finally, we're going to edit the Book a Consultation button. Let's have it with a nice pink background to make it stand it. I'm going to just copy that pink color - see the color code here - so that I can exactly use that same color on the border. Then I'm going to click the border, going to replace that border color. Now you see that the border is that pink, as well.
And, finally, we'll just make the text color a nice white. If we preview this now, we're going to see if this really stands out. Look at that. You get to the final page, and we've got this bright background color of that sort of Christmas tree scene in the background. So, it's immediately getting the reader in mind, like, "Oh, yeah, I have to remember to do the Christmas emails, as well. I'm just going to book a consultation so that someone else can take care of this for me."
So, that's the power of lead magnets. If you can provide quality content, you'll build trust and rapport with your audience, and they'll be more likely to hire you for your premium products and services.
So, that was an email template book. I hope you enjoyed it. I hope you can make one of these for your own business. Thanks very much.